Last Updated: March 2020
Instructions:
Pay an Email Invoice
Create a Redbird Account from Invoice
Access Your Service Agreements
Pay an Email Invoice
1. When you receive an email invoice, it will have a Pay Invoice Now button. If you don't have a Redbird Account, it will also have a Create Redbird Account button.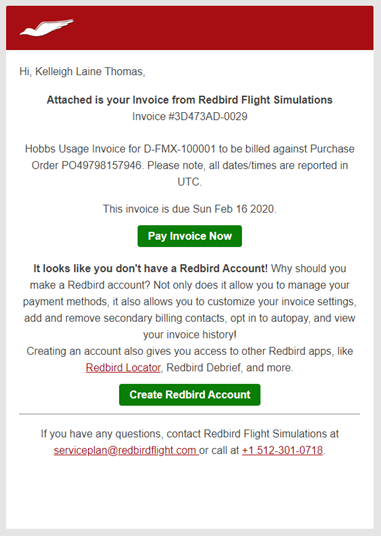
|
NOTE: If you don't have a Redbird account, the email invoice will include an option to create an account, or just pay the invoice without creating an account. |
2. To pay the invoice immediately, click the Pay Invoice Now button.
3. If you don't have an account, you're taken directly to the invoice payment screen.
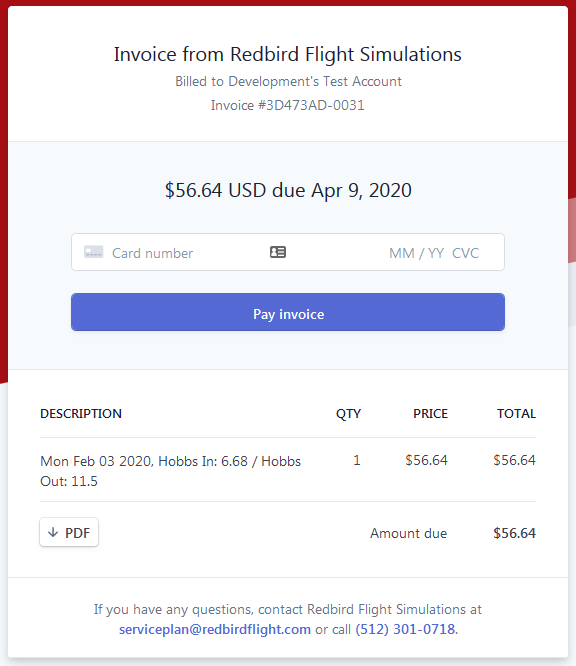
4.To download a copy of the invoice, click PDF in the lower left corner.
5. Enter your credit card information and click the Pay Invoice button.
6. If you do have an account and you're logged in, you'll be taken directly to the Invoice Details page. If you're not logged in, you'll first be asked to login and then you'll be taken to the Invoice Details page.
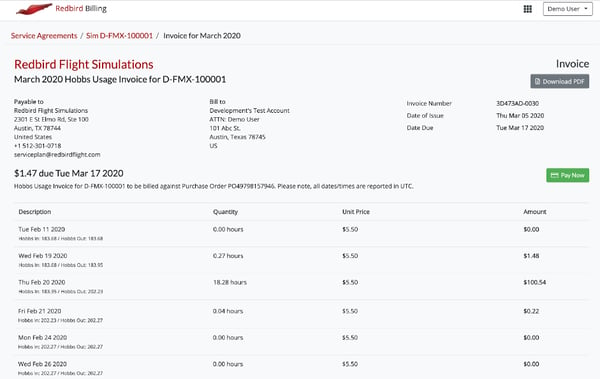
7. To download a copy of the invoice, click Download PDF in the upper right corner.
8. To pay the invoice, click the Pay Now button.
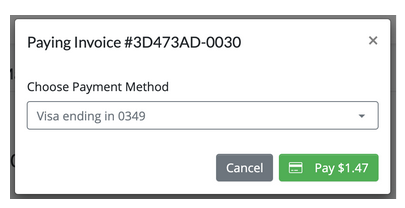
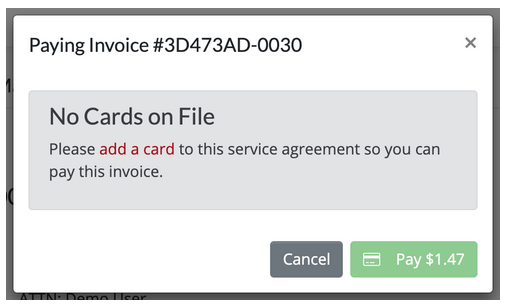
9. The Paying Invoice screen appears. If there's at least one credit card on file, the green Pay button will be active.
|
NOTE: Your credit card information is never stored at Redbird. Instead, it is stored with Stripe, the payment processor. |
10. If you have more than one credit card on file, select one from which to make the payment using the Choose Payment Method dropdown menu.
11. Click the Pay button.
12. After you successfully pay, you'll be able to download the receipt immediately by clicking the Download PDF button.
13. If you don't have a credit card on file, the Pay button will be inactive. Click the highlighted words "add a card" and follow the prompts on the Service Agreement page to enter your card information.
Create a Redbird Account
1. To create an account from your email invoice, click the Create Redbird Account button in the email you received from Redbird.
2. You're taken to the Create Your Redbird Account screen.
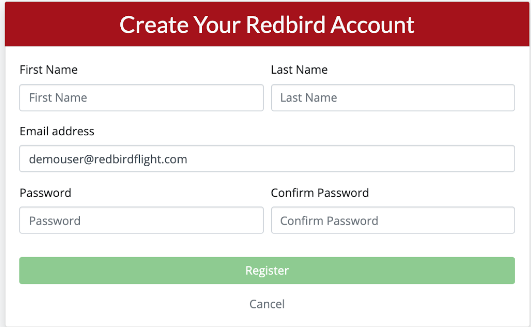
3. Enter your first name, last name, email address and password twice.
4. Click the Register button.
5. You'll be automatically logged in and asked to set up a payment method to pay the invoice.
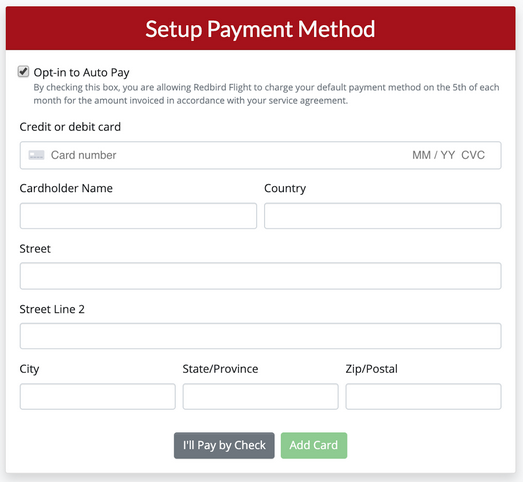
6. Leave the Opt-in to Auto Pay checkbox selected to enroll in monthly autopay.
7. Enter the credit card information as prompted.
8. Click the Add Card button.
9. You're taken to the Invoice Details page. Go to Pay Invoice step 7.
|
NOTE: You always have the option to pay by check. To do so, click Skip for Now or I'll Pay by Check. |
Access Your Service Agreements
1. If you're not already logged in, navigate to the Redbird account login page at account.redbirdflight.com.
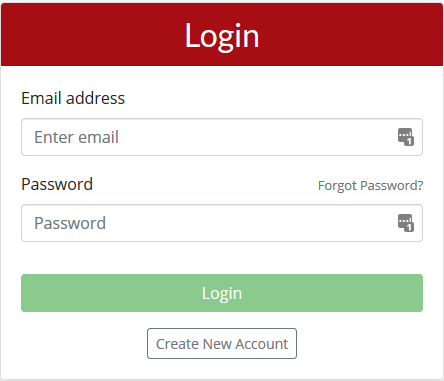
2. Enter your email address and password and click the Login button.
3. After you log in, in the upper right corner of the page, click on the menu icon

4. The pop out menu appears.
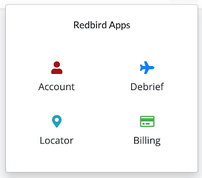 5. Click Billing.
6. The Service Agreements page appears.

|
NOTE: If you only have one service agreement, you'll be taken directly to that service agreement details page. If you don't see any service agreements, it may be because you haven't been granted access to them. |
7. If you have more than one service agreement, click on the service agreement whose details you wish to view.
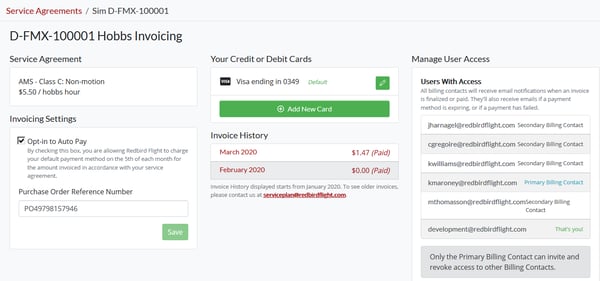
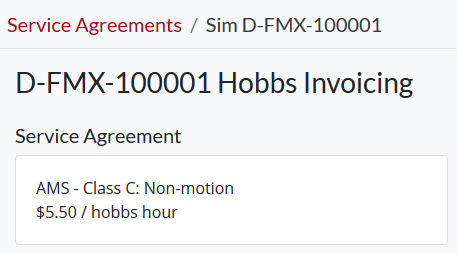
8. From the service agreement details page, you can do several things. First, you can view the service agreement type and cost per Hobbs hour in the upper left.
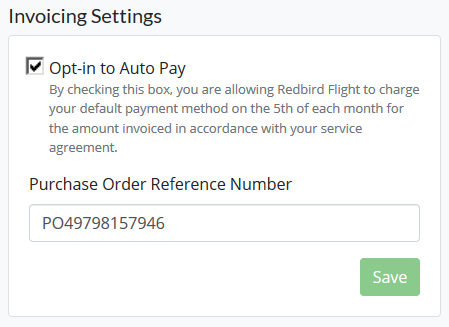
9. Next, you can opt in or out of Auto Pay and optionally set a purchase order reference number to be displayed on your invoices.
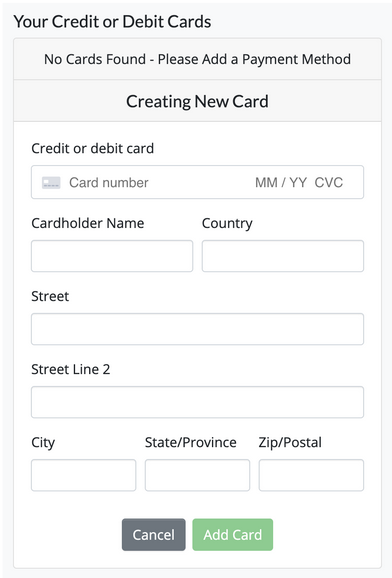
10. Also, if there is no credit card on file, you can create a new one.
11. You can also edit (or delete) any card on file by clicking the pencil icon.
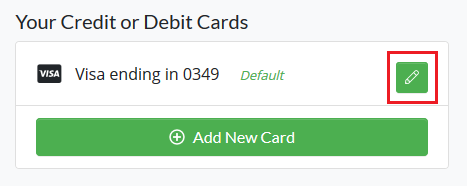
12. You can add another card by clicking the Add New Card button.
|
NOTE: If there’s only one credit card on file, it will automatically be set as the default payment method for that service agreement. |
13. You can view the invoice history for the service agreement.
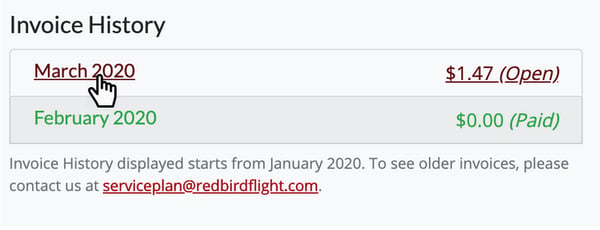
14. Clicking on an invoice takes you to that invoice's Invoice Details page.
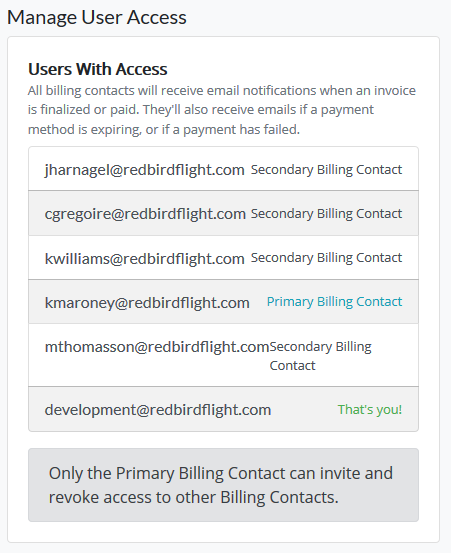
15. You can manage user access to service agreements on the right side of the page.
|
NOTE: There is only one Primary Billing Contact, but there can be multiple Secondary Billing Contacts. All Billing Contacts receive invoice email notifications, however only the Primary Billing Contact can invite and revoke access for Secondary Billing Contacts. |
16. If you are the Primary Billing Contact, the Manage User Access area will look like this.
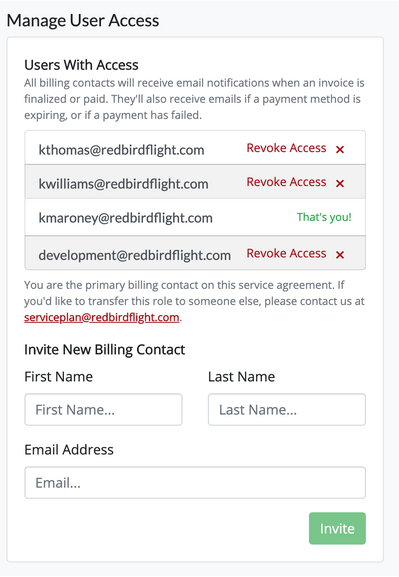
17. To revoke access of a Secondary Billing Contact, click the red "Revoke Access x" to the right of their name.
18. To invite a Secondary Billing Contact, enter their first name, last name and email address at the bottom and click the Invite button.
|
NOTE: For technical support, contact the Redbird Technical Support Team using the Navigator support menu on your Internet-connected simulator, or via email at support@redbirdflight.com, or by calling +1 512-301-0718 between the hours of 7am-6pm U.S. Central Time (-5/-6 UTC) Monday - Friday, excluding normal U.S. holidays. |
