- Redbird Connect Requirements (link)
- Installing Redbird Connect (link)
- Sharing a Training Session (link)
- Joining a Training Session (link)
- Managing a Training Session (link)
Redbird Connect Requirements
- A Redbird simulator running any version of Redbird Navigator.
- The Redbird must be connected to the internet.
- Both the student and the instructor will need an internet-connected laptop or mobile device with a 3rd party video conferencing app, such as Google Meet or Zoom.
- We recommend the instructor use 2 monitors or a computer and mobile device. Ideally, the instructor will have one screen or the mobile device dedicated to the video conference and one screen dedicated to the web-based Navigator interface that Connect enables.
Installing Redbird Connect
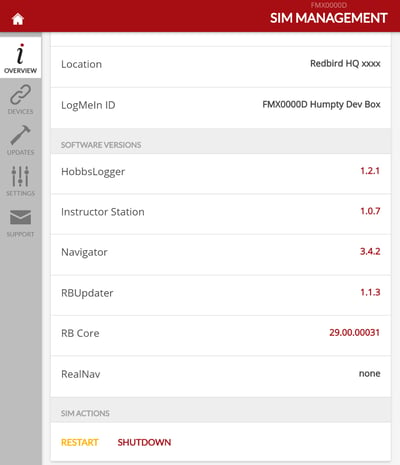
- First, ensure that the simulator is running the latest version of Navigator, which is 3.4.8 – If you do not have the latest version of Navigator, you will see a bell icon in the upper right hand corner of the Navigator main menu page.

- If you see the bell icon, click the Sim Management button on the main Navigator menu, and the Sim Management page appears.
- To update the software or download updated flight scenarios, click Updates on the left side menu. The Updates login screen appears.
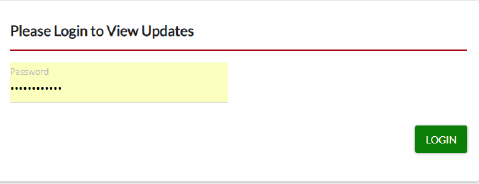
- Enter the Simulator admin password (the default is Redbird12345) and click the Login.
- If there are updates available, click the Update All button - The installation progress bar will appear.
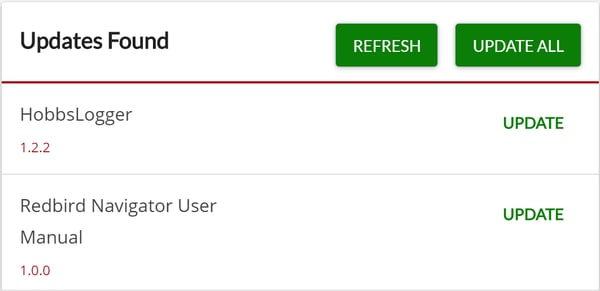
- Now that the latest version of Navigator is installed on your simulator, a new icon will appear on your Navigator main menu called Connect.

Sharing a Training Session
These are the instructions to start and share a remote session from the simulator. Typically, this will be done by the student while sitting at the device. See Joining a Training Session for the steps to connect remotely after a session has been shared.
- Start a video conference with your instructor on your laptop or tablet.
- You should place the laptop or tablet where your instructor has a clear view of the control panel, and can see you manipulate the controls – it is not necessary for the video conference to include a view of the airplane’s windows - if possible, we recommend that you place the laptop where an instructor would normally sit in an airplane, the right seat.
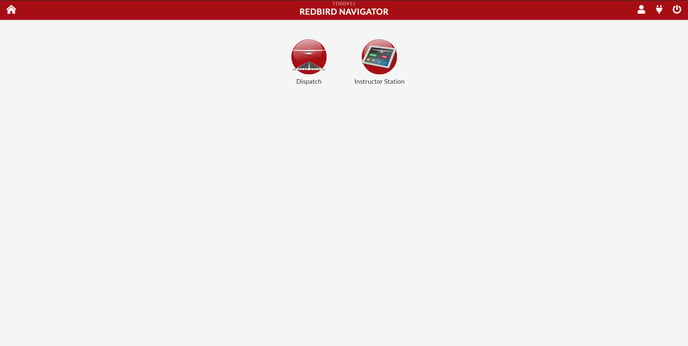
- On your Internet-connected simulator, go to the main menu (aka Springboard) in Navigator and select the Connect icon .
- Click the “Start Sharing” button – a device specific 6-digit code will appear.
- Use the video conference to confirm that your instructor is ready to copy the code.
- Read the 6-digit code to your instructor.
- Once your instructor has entered the code, they will connect to your device and gain access to Dispatch and Instructor Station features.
- Your instructor may lunch a flight or you can use Dispatch as you normally would.
- Once the lesson is complete, use Navigator to return to the Connect app.
- Click the “Stop Sharing” button, your device is no longer accessible via Connect.
Joining a Training Session
These are the instructions to join a remote session once it has been shared from the simulator. Typically, this will be done by the instructor from a remote location.
- Join the video conference with your student.
- Open a web browser (Chrome is recommended) and go to flyredbird.com.
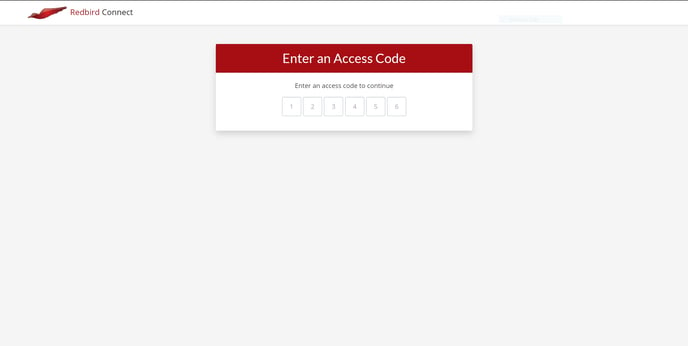
- Enter the device specific 6-digit code generated by the student.
- A connection with the shared session will be established. (See note below)
- Once you're connected, the Navigator Springboard will display.
- You are now able to use the Dispatch and Instructor Station apps to manage the training session.
Please note, you'll only be connected if the student has enabled an active shared session. You'll see an error message if you incorrectly entered the code or the device is not currently sharing a session.
Managing a Training Session
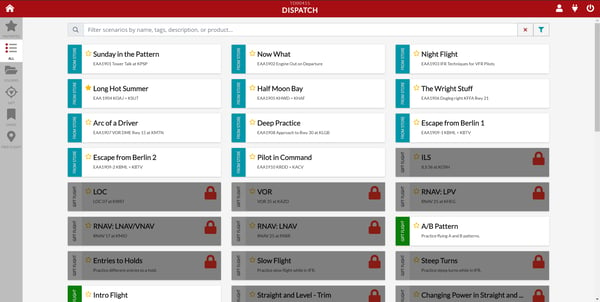
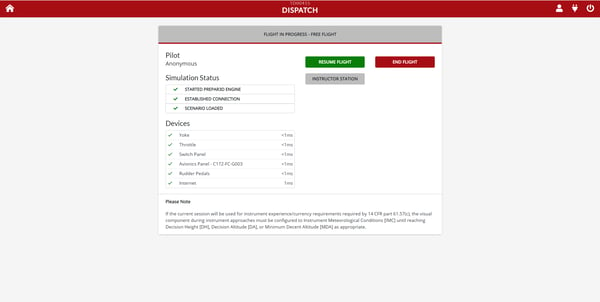
The remote instructor has access to the standard Dispatch app functions to launch flights. The student my also use Dispatch on the local device. Dispatch functions include starting a Save Flight, GIFT Modules, and Free Flight
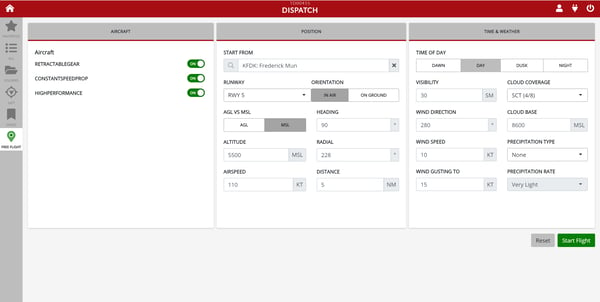
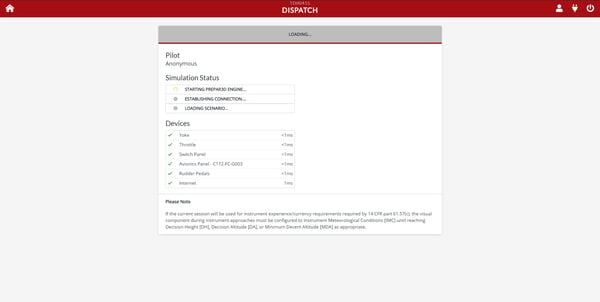
Once you select or build a flight, click "Start Flight" and you'll see a Flight Loading screen.
Once the flight is active, the screen will update to show "Flight In Progress". You'll have quick access to resume/un-pause the flight, end the flight, or launch the Instructor Station App.
To enable the split screen, PFD and moving map display, launch the Instructor Station and then click on the artificial horizon button in the top right of the header bar.
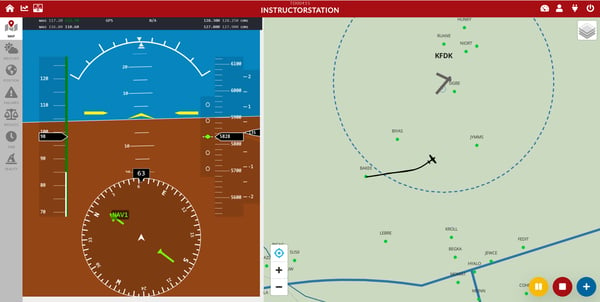
You'll have full access to all the standard Instructor Station functions via Connect. These include changing weather, position, failures, weight and balance, time of day, and the physics bending available with the Reality tools.
The instructor may cycle through navigation source driving the HSI on the PFD by clicking the navigation source indicator on the HSI – Instructor can see COM and NAV frequencies, but only student can change them.